Update Preferences in cPanel: Password, Contact, and User
How to set preferences, change passwords, and manage users in cPanel. Complete guide to optimizing your cPanel settings.
Once you understand the cPanel
's basic interface, the next important step is to set your account preferences. These settings include account security, contact information, and user management.
Accessing Preferences in cPanel
When you log into cPanel for the first time, make sure you visit the “preferences” section to update your contact information and change the password you use.
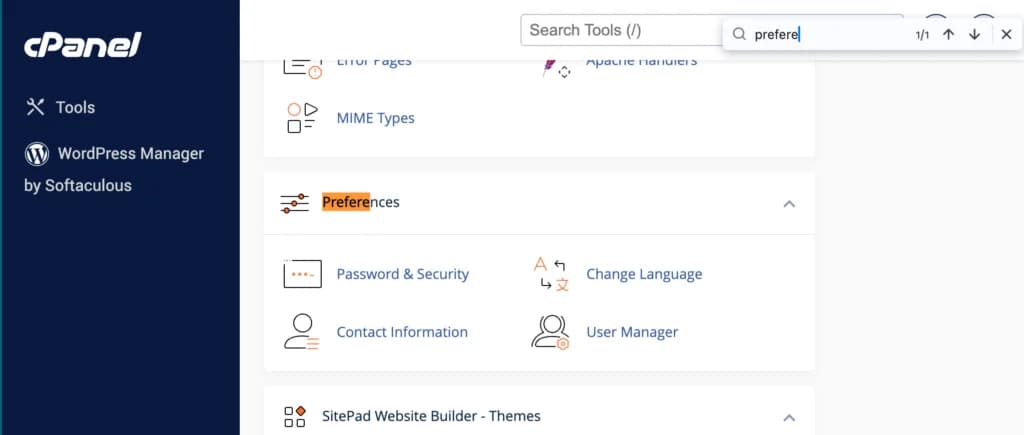
In the Preferences section, you will find several important options:
- Password & Security - To change your password and manage account security
- Contact Information - To update your contact information
- User Manager - To manage additional users on your cPanel account
- Style - To change the appearance of cPanel
- Localization - To set the language and time zone
Let's discuss each option in detail.
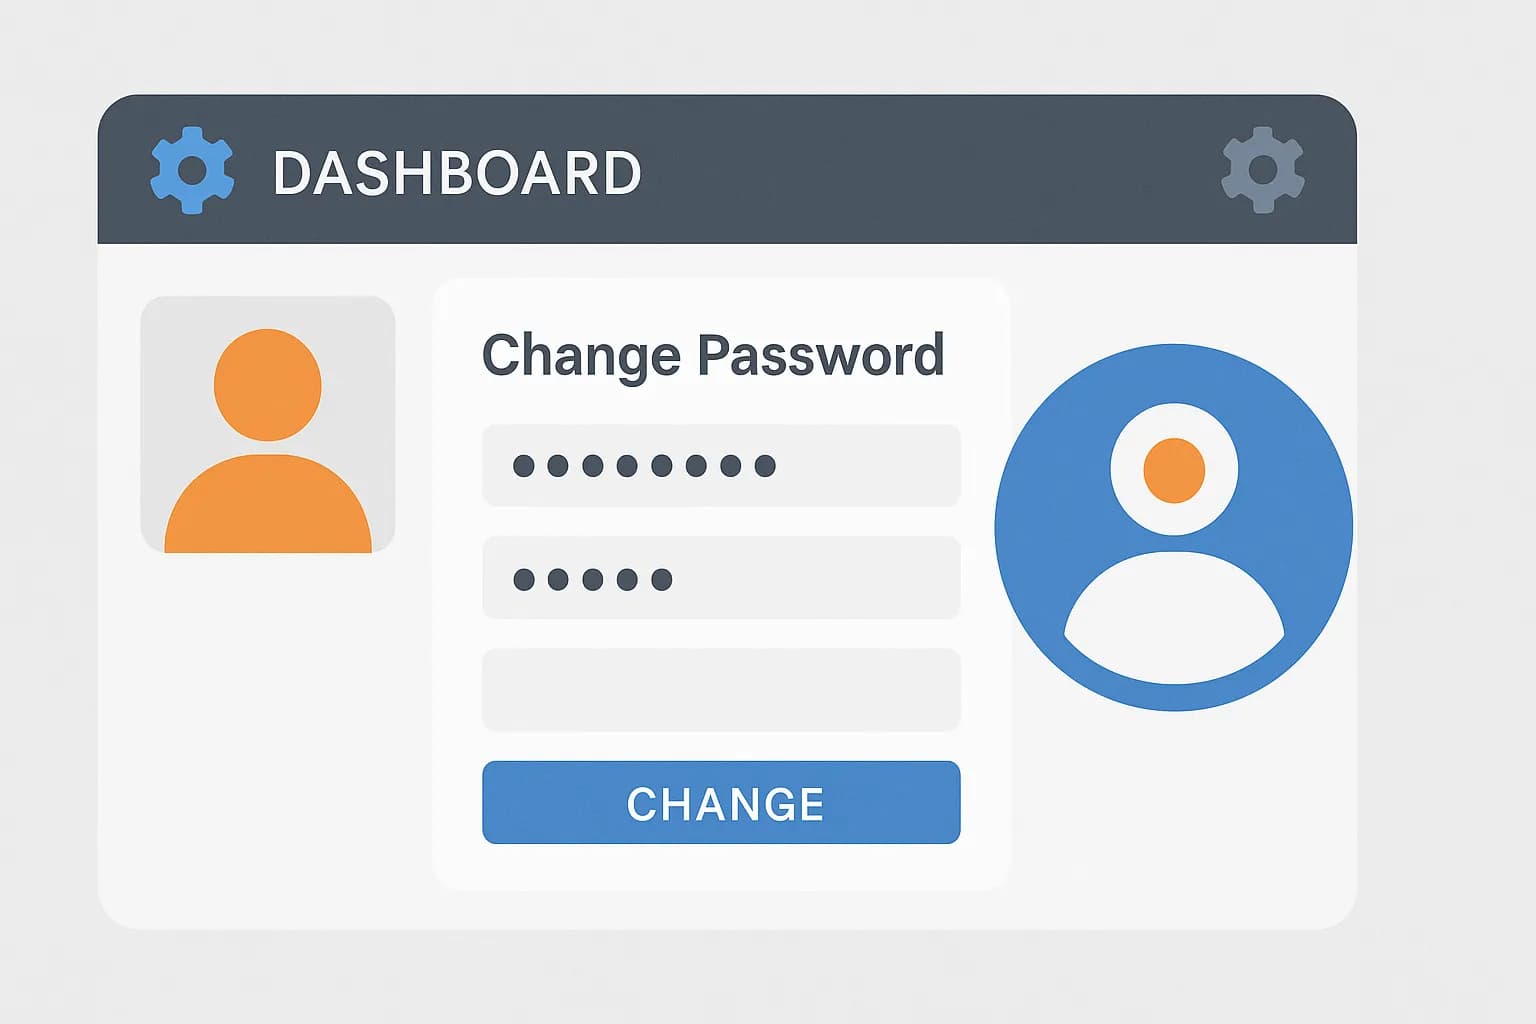
Change Password
I highly recommend regularly changing your password at least once every 3 months to protect or prevent your website from being hacked.
First of all, click "password & security" in the preferences section.
Then you will see a page with a display like the one below.
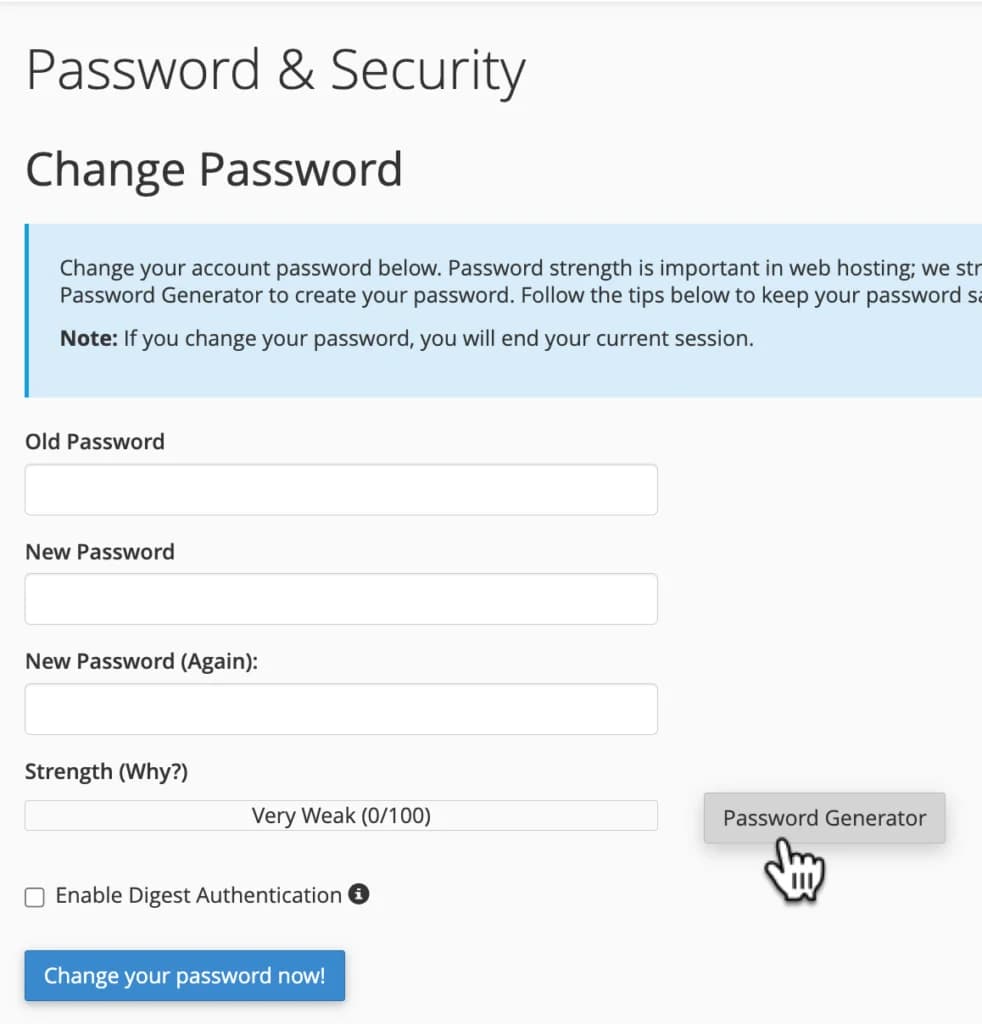
Before you change your password with a new password, make sure you know your old password.
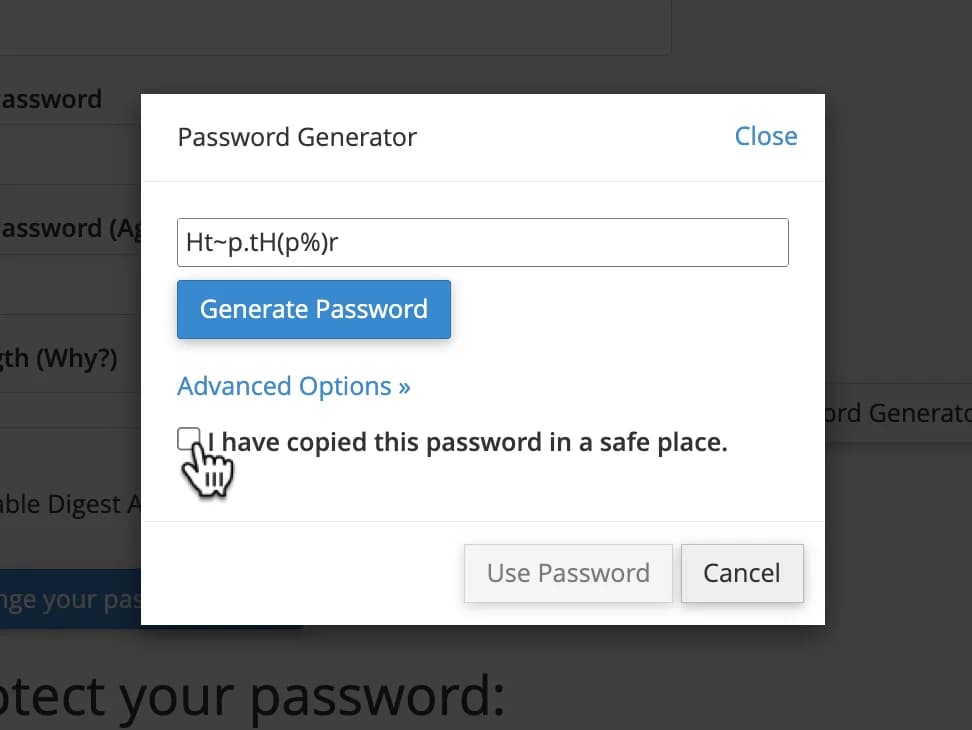
I also recommend using a “password generator” to get a strong password.
Best Practices for cPanel Passwords
Here are some best practices for creating strong passwords:
-
Use a minimum of 12 characters - The longer, the better
-
Combine uppercase and lowercase letters - For example “AbCdEf”3. Include numbers - For example “123456”4. Add special characters - Like “!@#$%^&*()”5. Avoid personal information - Don't use names, birth dates, or other easily guessed information
-
Don't use the same password - Use a unique password for cPanelMake sure you save your new password in a safe place.
My recommendation is to use a password storage app like 1Password, LastPass or BitWarden (free).
What if you lose your old password?
- If you forget to write down your password, go back to your hosting account dashboard or check the cPanel account details email sent by the web hosting provider after you buy hosting.
- If the email has been deleted or you can't find your old password, don't panic! Contact your web hosting provider's support via live chat/help ticket and ask about your old cPanel password.
Update Contact Information
Generally, the email you use when registering for hosting will be the main email on your cPanel, but for security reasons, I recommend that you use a different email to receive updates from cPanel.
To update contact information, click "Contact Information" in the preferences section and you will see a display like the one below.
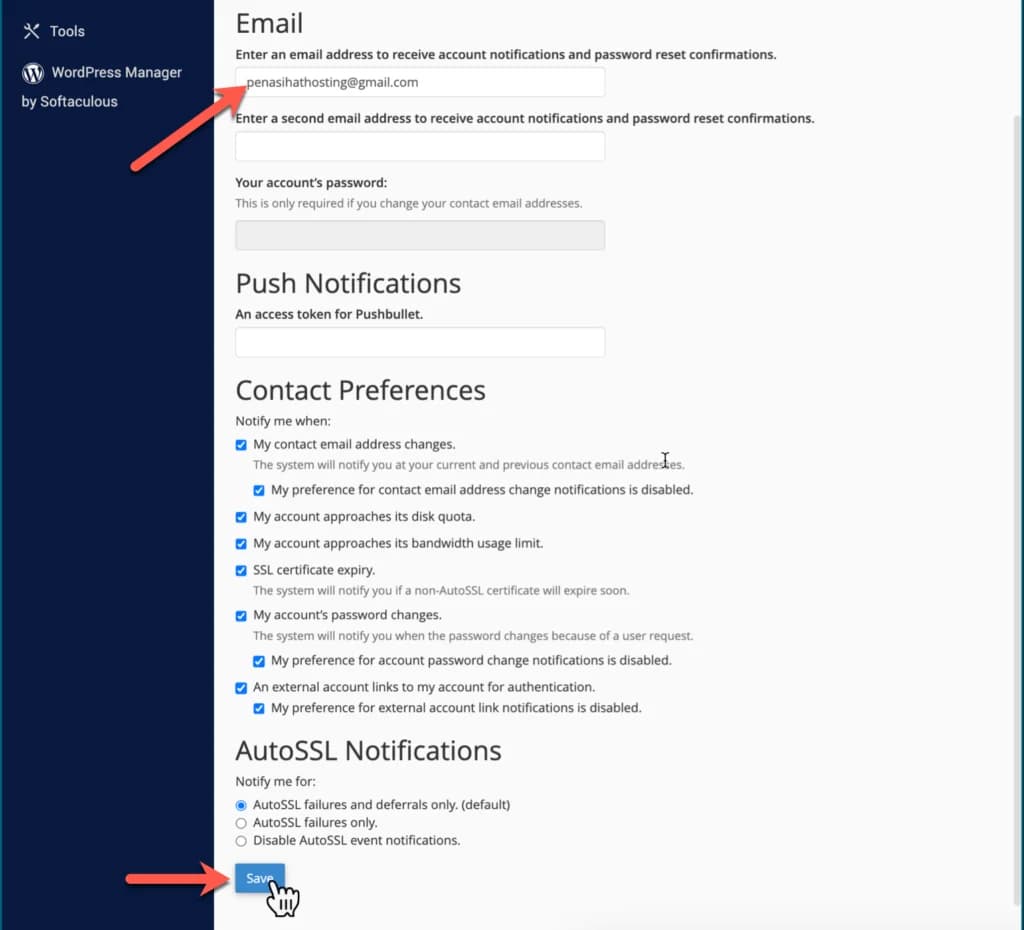
I recommend that you check all the boxes in "Contact Preferences", so that you receive notifications if something suspicious happens, such as someone else changing your password or a problem occurs such as disk space usage/bandwidth usage exceeding capacity.
The Importance of Accurate Contact Information
Having accurate contact information is critical for several reasons:
- Security Notifications - You will be notified if there is any suspicious activity
- System Notifications - Information about server maintenance or problems
- Account Recovery - Required to restore access if you forget your password
- Important Communications - Notifications about policy updates or changes
Adding New User
Let's say you have a web developer or team member who helps you create or manage a website, and need access to make a change in your cPanel.
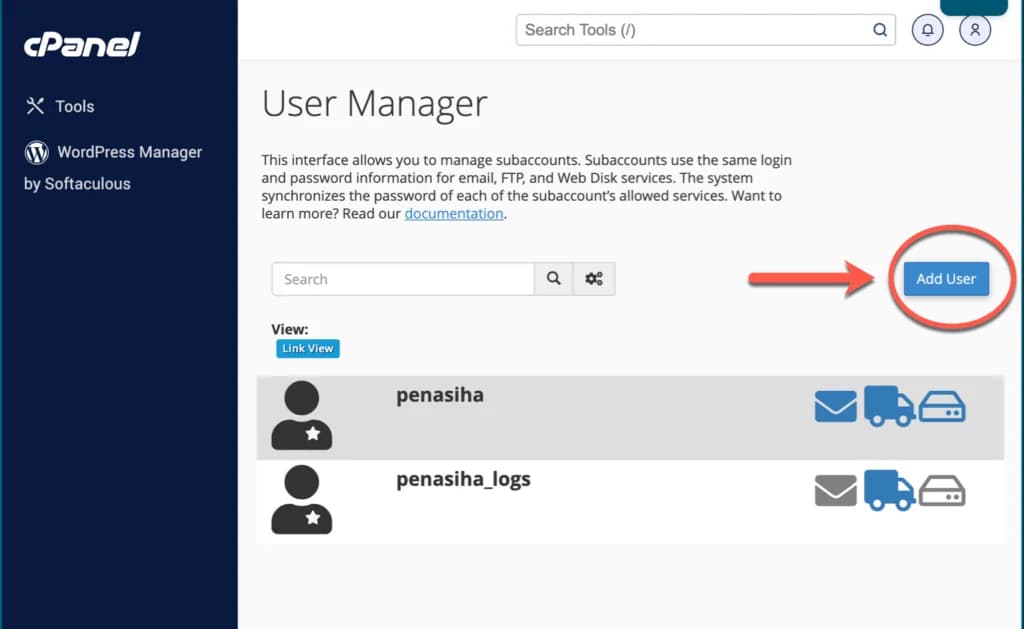
On this page, you can see all the accounts that you have created in your cPanel, and to the right of these accounts, there are three icons:
- The mailbox icon indicates that this account has an email account integrated with it.
- Delivery truck icon indicates that this account has access to FTP (file transfer protocol)
- The disc drive icon indicates that this account can use the storage/web disk available in your cPanel.
You can easily edit, delete or change the password for each account by clicking on the options below the account name.
To add a new user, click "Add User" in the upper right corner or circled in red in the image below.
Then you will be directed to the following page:
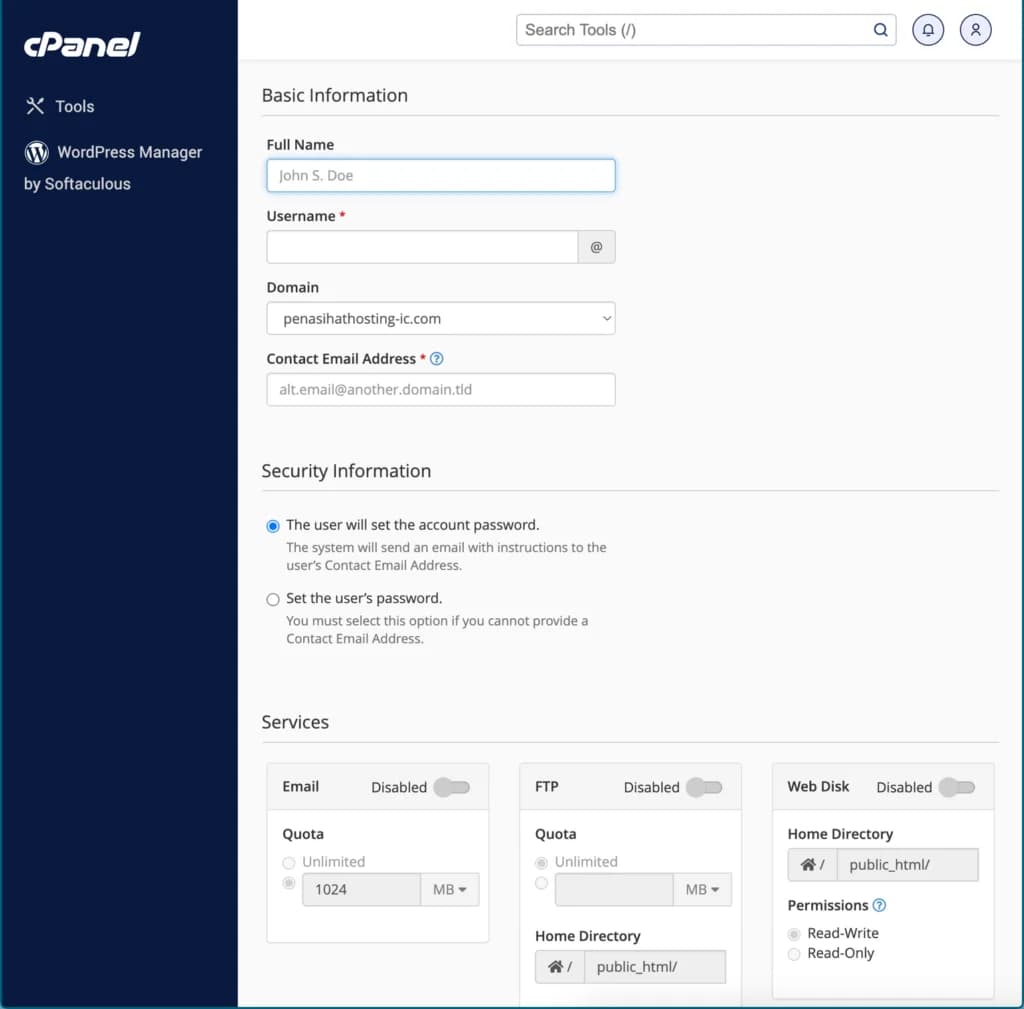
On this page, to add a new user you need to fill in the full user name, username, domain that is integrated with the new user, then contact email address where the system will then send a notification, such as confirmation of a password reset request.
You are also asked to create a password for that user, and make sure to create a different password from other users in your account.
After that, below there is a section called "services", where in this section you need to determine the settings for the new user, such as email, FTP and web disk.
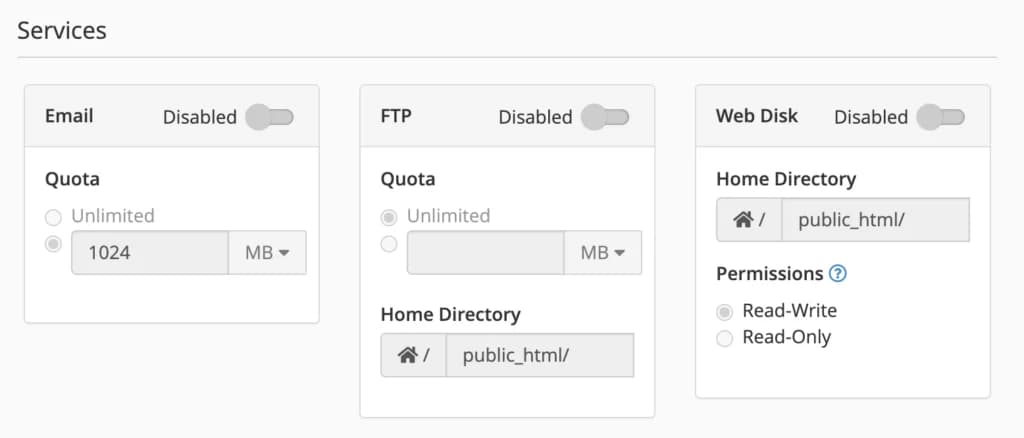
- Email allows you to enable/disable email accounts for users (although you need to set up user accounts first) and set the required limit for each account, for example 1024mb.
- FTP allows you to enable/disable accounts to be able to access File Transfer Protocol, where users can upload files to your website. You can also choose which directory the user has access to, and set the space limit required (the same as the email limit), say 1024mb.
- Web Disk should be enabled only for primary users, meaning you as the website owner or for “top-level admin” user accounts. Where users who have access to the web disk can be given two "permissions" options, namely Read-White (gives permission to the user to do anything, including deleting a file in a certain directory), while Read-Only (users can only read files and download them).
When you have finished setting everything, click "Create" or "Create and Add Another User" at the bottom left of the page to save your new account settings.
User Management Best Practices
Here are some best practices when managing users in cPanel:
-
Minimum Access Rights Principle - Give users only the access they need
-
Use a Unique Password - Each user must have a different password
-
Regularly Audit - Check active users and remove unnecessary ones
-
Document Access - Note who has what access
-
Limit Admin Access - Don't grant full admin access unless absolutely necessary
Other Preference Settings
In addition to the settings discussed above, there are a few other preference settings you might want to adjust:
Language Settings
cPanel is available in various languages. To change language:
- Click "Change Language" in the Preferences section
- Select the language you want from the list
- Click "Change"
Time Zone Settings
To change the time zone:
- Click "Change Timezone" in the Preferences section
- Select the appropriate time zone for your location
- Click "Change"
Style Settings
To change the appearance of cPanel:
- Click “Change Style” in the Preferences section
- Choose the style you want
- Click "Change"
Conclusion
Updating preferences in cPanel is an important step to ensure the security and comfort of using your cPanel. By setting strong passwords, updating contact information, and managing users wisely, you can protect your website from unauthorized access and ensure that you always have important information regarding your hosting.
In next chapter, we'll learn how to manage domains in cPanel, including how to add new domains and set up redirects.
Always use a strong and unique password for your cPanel. Never use the same password for different services. Consider enabling two-factor authentication if available for an additional layer of security.