Backup Website Files in cPanel: Complete Guide
How to backup and restore website files in cPanel. Complete guide to protecting your website data with automatic and manual backups.

Once you understand how to manage website files in cPanel, the next important step is to learn how to perform backups. Backups are one of the most important aspects of managing a website because they protect your data from loss due to human error, malware attacks, or server failure.
The Importance of Website Backups
If you have ever lost your cellphone, computer/laptop, or other valuable item, you must have felt annoyed, hurt, confused or whatever emotion you are feeling, but besides losing valuable items, you also lost important data on them that you may not have backed up.
So that such a tragedy does not happen to your website, cPanel has made everything easy by providing a bakcup feature, so you can restore your website files if you lose a file or the entire contents of your website files.
Several reasons why website backups are very important:
- Protection from human error - Errors when editing files can damage the website
- Recovery from malware attack - Restores the website to its pre-infected state
- Website migration - Simplifies the process of moving a website to a new hosting
- Testing changes - Allows you to test major changes without risk
- Peace of mind - Knowing your data is safe if something goes wrong
Types of Backups in cPanel
In cPanel, there are several types of backups you can perform:
-
Full Backup - Backs up the entire hosting account, including files, database and email settings
-
Partial Backup - Backs up specific components only:
- Home Directory (website files)
- MySQL Databases (databases)
- Email Forwarders & Filters (email settings)
Automatic Backup in cPanel
Well, in cPanel itself, hosting providers usually include an automatic backup feature, where your website will be backed up automatically by the system and stored on the server, so you don't need to back it up manually by downloading it.
The automatic backup feature that is quite widely used is JetBackup.

With JetBackup, you even have access to view full backup files, databases, cron jobs and even email backups.
Depending on the hosting provider you use, some will back up your website once a day, some once a week, some once every three days.
How to Use JetBackup
If your hosting provides JetBackup, here's how to use it:
- Access JetBackup - Click the JetBackup icon in cPanel
- Select backup type - Full Backup, Home Directory, MySQL Databases, or Email
- Select backup version - Backups are sorted by date
- Select file or folder - For partial restore
- Click Restore - To restore the selected files or folders
JetBackup typically stores multiple backup versions, so you can select a specific point in time to restore.
Manual Backup in cPanel
However, if the cPanel you are using does not have an automatic backup feature, you may need to backup manually. For example, through the Softaculous feature in cPanel.
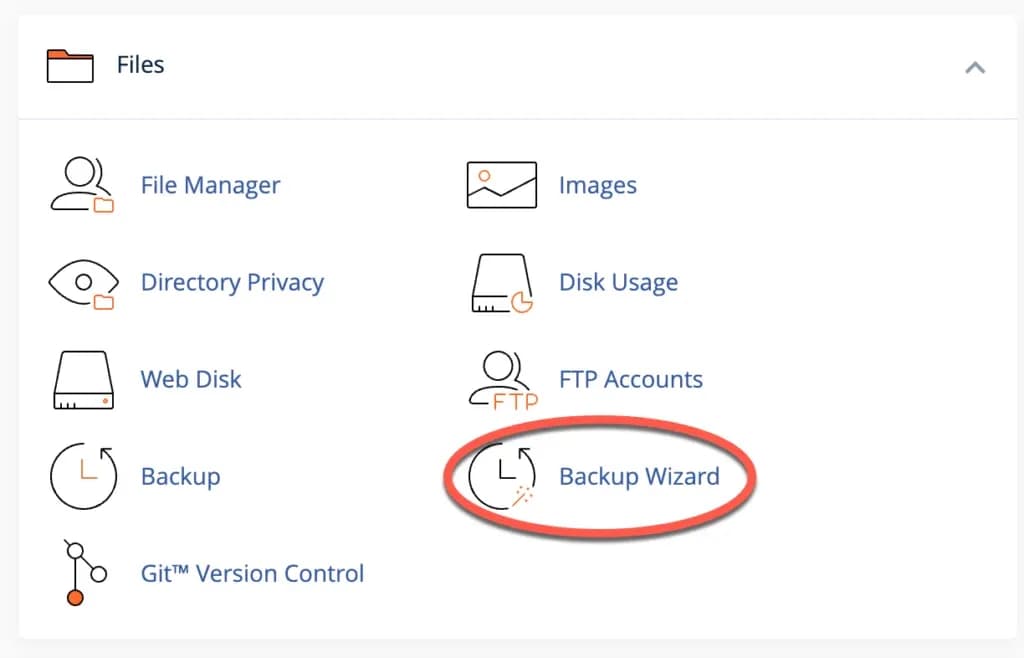
If you want to do it manually in cPanel, you can follow the following tutorial:First, click “Backup Wizard” in your cPanel as shown below (you can also click “Backup”, but to make the process easier, choose “Backup Wizard”).
Then you will be directed to the following page:

From here, click the “Backup” button to start the process of backing up your website files.
Then you will be faced with a choice where you have to choose between backing up the entire file (full backup) or partial backup (Home Directory, MySQL Databases, Email Forwarders & Filters).
For your convenience in the future, choose a full backup and save it in a safe place such as on your external HDD or flash disk, or if you are not too paranoid about security, you can save it on your computer/laptop.

Finally, you are asked to choose a backup place/destination, for which you simply select "Home Directory".

You can also enter an email address if you want to receive an email notification when the backup process has been completed and to complete the backup process, click the "Generate Backup" button.
Partial Backup
Apart from full backups, you can also perform partial backups for certain components:
Backup Home Directory
- Click “Backup” in cPanel
- In the “Partial Backups” section, click “Download a Home Directory Backup”
- Wait for the backup process to complete
- Click the download link that appears
Backup MySQL Databases
- Click “Backup” in cPanel
- In the “Partial Backups” section, click “Download a MySQL Database Backup”
- Select the database you want to back up
- Click "Generate Backup"
Backup Email Forwarders
- Click “Backup” in cPanel
- In the “Partial Backups” section, click “Download Email Forwarders”
- Wait for the backup process to complete
- Click the download link that appears
Restore Backup in cPanel
Having backups is useless if you don't know how to restore them. Here's how to restore a backup in cPanel:
Restore Full Backup
- Click “Backup Wizard” in cPanel
- Click "Restore"
- Select the type of backup you want to restore
- Upload a backup file or select from the server
- Click "Restore"
Partial Restore
For a partial restore, the steps are similar to a full backup restore, but you need to select the specific components you want to restore:
- Click “Backup Wizard” in cPanel
- Click "Restore"
- Select the partial backup type (Home Directory, MySQL Database, or Email Forwarders)
- Upload a backup file or select from the server
- Select the specific files or folders you want to recover
- Click "Restore"
Recommended Backup Schedule
How often you should backup depends on how often your website is updated:
- Frequently updated website (active blog, e-commerce):
- Full backup: Weekly
- Database backup: Daily
- File backup: Whenever there are significant changes
- Websites that are rarely updated (static websites, portfolios):
- Full backup: Monthly
- Database backup: Weekly
- File backup: Whenever there are changes
Website Backup Best Practices
Here are some best practices for website backups:
- Follow the 3-2-1 rule - Make 3 backup copies, store them on 2 different media, and 1 in an offsite location
- Automate the backup process - Use an automatic backup feature or plugin
- Verify backup - Make sure the backup can be restored properly
- Backup encryption - Protect sensitive data with encryption
- Document the process - Note down the backup and restore steps
- Backup rotation - Delete old backups to save space
- Backup before major changes - Always backup before updates or significant changes
Checking Disk Space
No matter what your hosting provider tells you, disk space will NEVER be unlimited. There are always limitations to its use, and as a new webmaster, you need to know how much space you are using.
It's also important to check your disk space periodically to see which parts of your website are taking up the most space.
Click “Disk Usage”.

Then you will be directed to the “Disk Usage” page as follows:

This page gives you information about the different sections of your file manager and shows how much disk usage each section has.
You can also see the total disk usage in the first table, for example in the image above it shows the total disk usage is 372.29 MB.
Manage Disk Space for Backup
Backups can take up a lot of disk space. Here are some tips for managing disk space for backups:
- File compression - Use a compression format such as ZIP or TAR.
GZ 2. Delete temporary files - Clean cache and temporary files
- Selective backup - Backup only important files, ignore cache and log files
- Use external storage - Save backups on cloud storage or an external hard drive
- Rotate backups - Delete old backups periodically
Conclusion
Backing up website files is an important step in managing your website. By performing regular backups, you can protect your data from loss and ensure your website can be restored quickly if a problem occurs.
In next chapter, we will learn how to install SSL in cPanel, an important step to secure your website.
Don't just rely on automatic backups from hosting. Always make regular manual backups and save them in a different location. Remember, the best backup is one you never need, but is always available when you need it.