Email Account Settings in cPanel: Complete Guide
How to create and manage email with your own domain in cPanel. Complete guide to setting up email, webmail, forwarding, and spam filters.
Once you understand how to manage domains in cPanel, the next step is to learn how to set up email accounts. One of the advantages of having your own hosting and domain is the ability to create email addresses with your own domain, which looks more professional than free email services.
Introduction to Email in cPanel
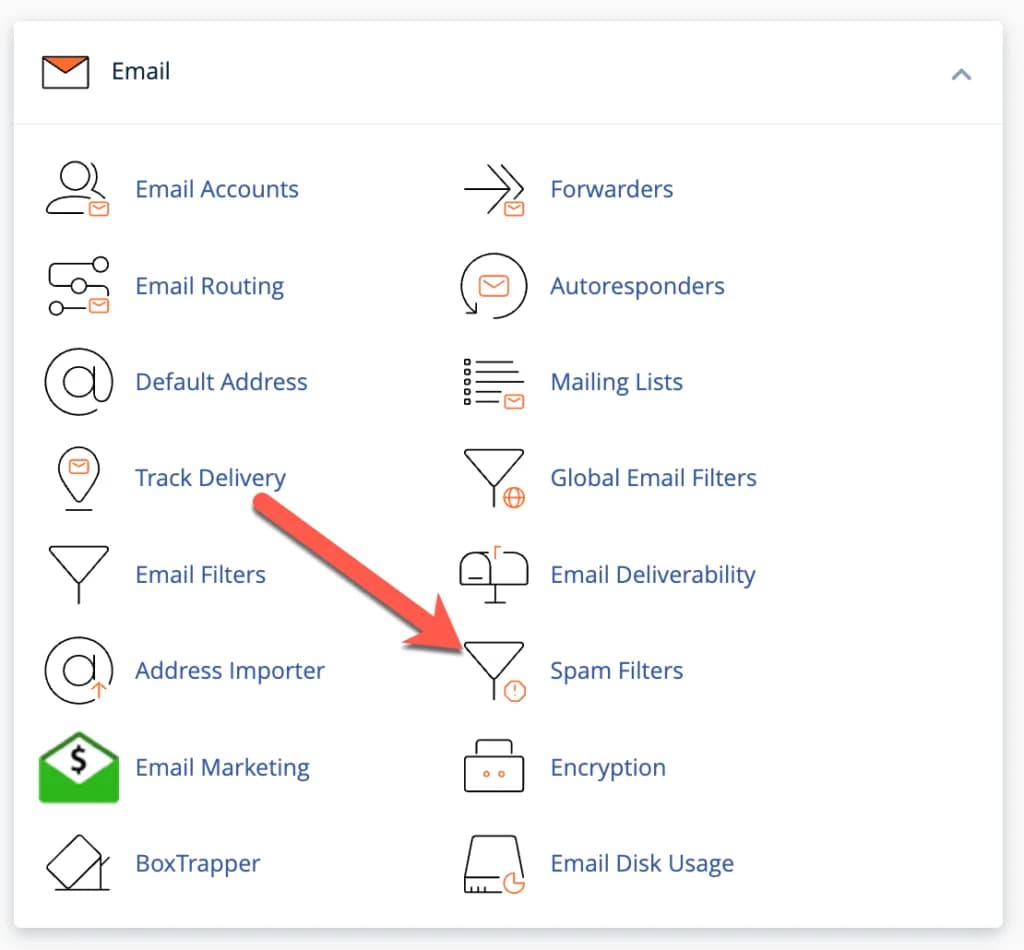
The “Email” section of cPanel allows you to manage all aspects related to your email:
- Starting from creating a new email,
- Create email autoresponders
- Up to activating "SpamAssassin" to prevent spam emails.
Ah, yeah..
The good news is, you can create email accounts using your own domain names like [email protected], so you'll no longer have to use boring email addresses like [email protected].
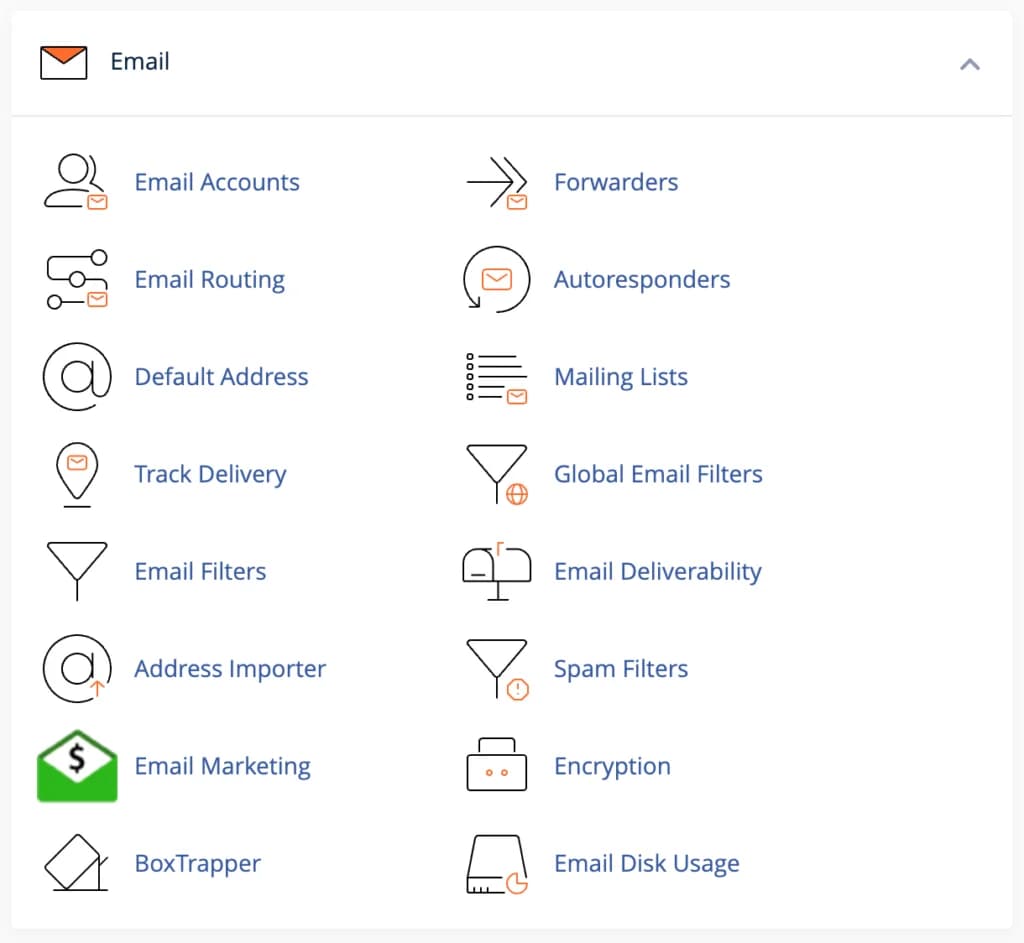
In the Email section, you will find several key features:
- Email Accounts - To create and manage email accounts
- Forwarders - To forward email to another address
- Email Filters - To set email filters
- Autoresponders - To set up automatic replies
- Spam Filters - To configure spam filters
- Mailing Lists - To create and manage mailing lists
- Global Email Filters - To set global email filters
- Email Deliverability - To check email delivery statusLet's discuss each feature in detail.
Create an Email Account
Click “Email Accounts” in your cPanel as seen in screenshot above to create an email account with your own domain name.
On the "Email Accounts" page as in the image below, pay attention to what I circled in red. Where:
- ♾️ Available is the number of emails you can create on your hosting. The amount of course varies depending on the hosting package you choose. If it shows ♾️, then you can create an "unlimited" email account (without quotes).
- And 0 used is the number of accounts you have used. In my example below, I haven't created an email account at all so the number is still 0.
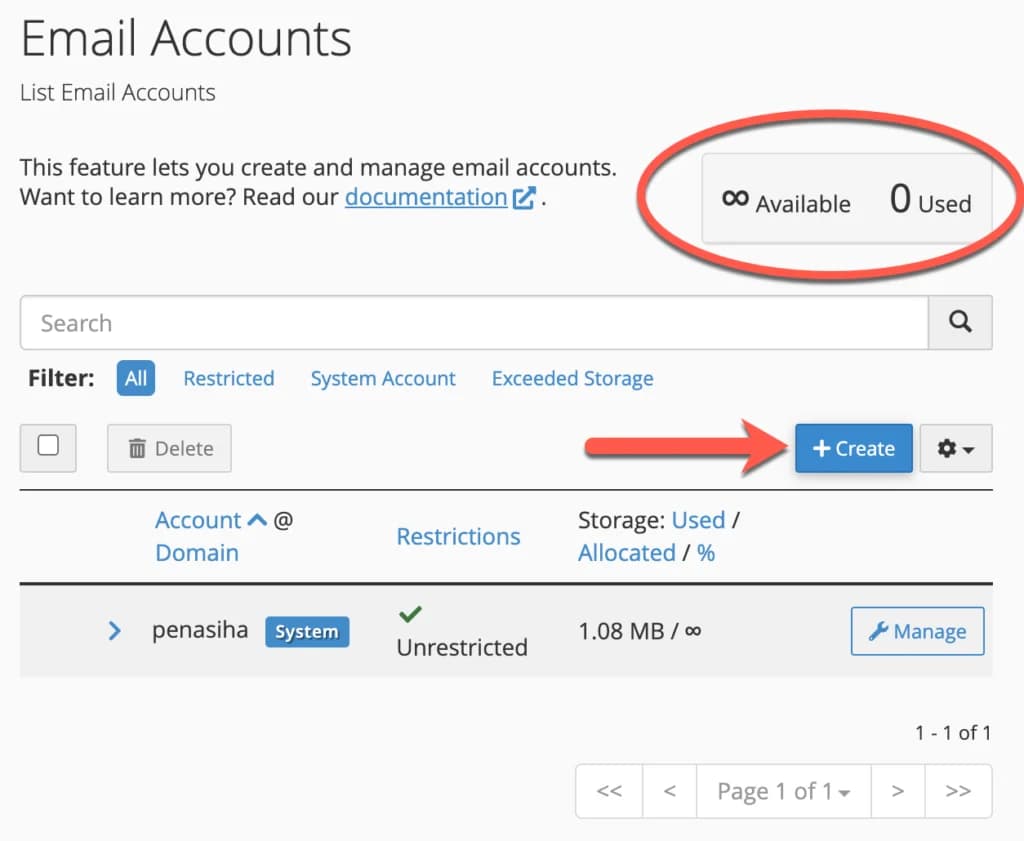
So, to create an email account, click the "+ CREATE" button that I pointed to in the image above.
Then you only need to fill in the forms provided, from top to bottom:
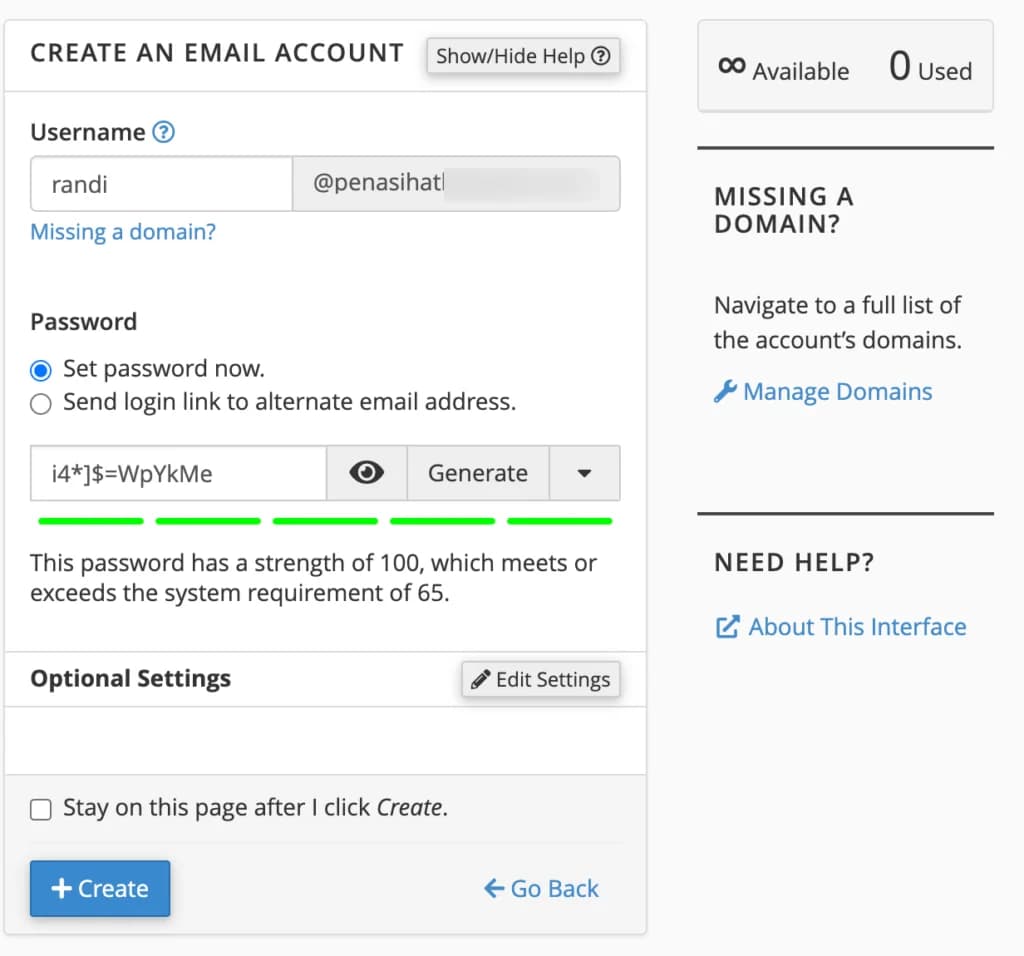
- In the “Username” column, enter the email address or email name you want - for example “Admin” or “yourname”.
- You can leave the option 'Set password now'
- Write the password in the "Password" column. Make sure you create a strong password. Once again, I suggest using a password generator (click GENERATE).
- Finally, determine your email storage space (click the "Edit Settings" button to open the options), for example 100 MB, 200MB, 1000MB or unlimited. You need to know that the space in this email will reduce the space on your hosting account, so maybe you won't give other people unlimited access.
- Click the "Create" button
When you have created a new email, you will find that the email you just created will be listed in the list of email accounts below:
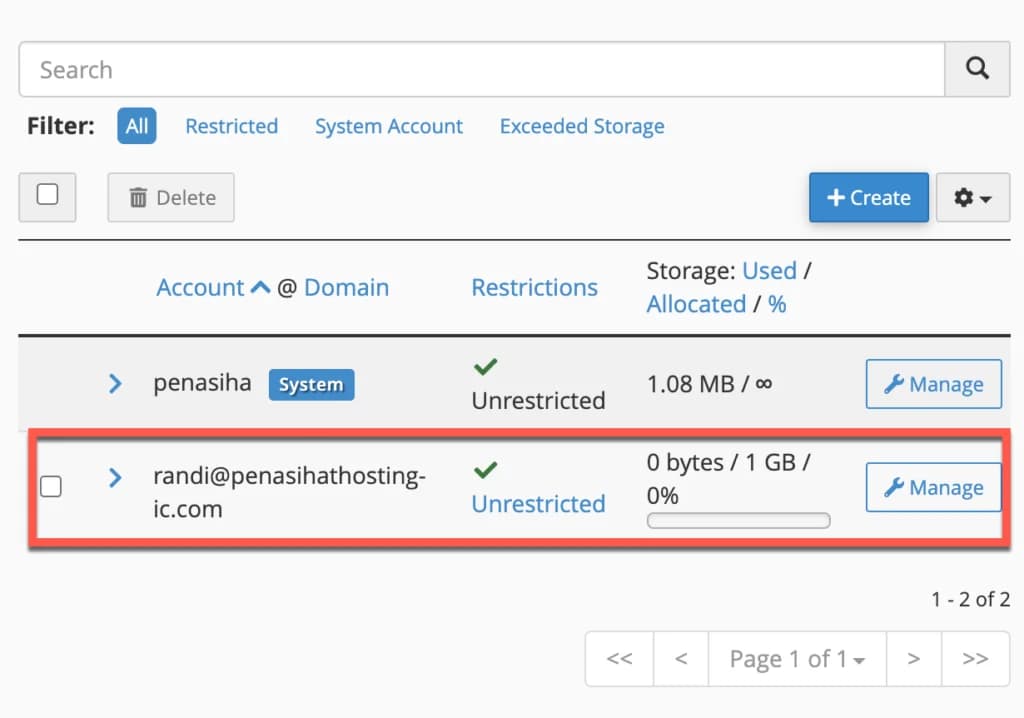
In the list of email accounts above, you can manage everything related to your email account, including password, quota, delete and mail client.
Best Practices for Email Accounts
Here are some best practices when creating and managing email accounts:
- Use a professional name - Choose a username that is professional and easy to remember
- Create a strong password - Use a combination of letters, numbers and special characters
- Set the appropriate quota - Adjust the quota according to hosting needs and capacity
- Create separate accounts - Create separate accounts for different functions (admin, info, support, etc)
- Backup emails regularly - Use an email client to download important emails
Access Webmail
So, now you have created an email with your own domain name.
So how do you log in/access webmail?
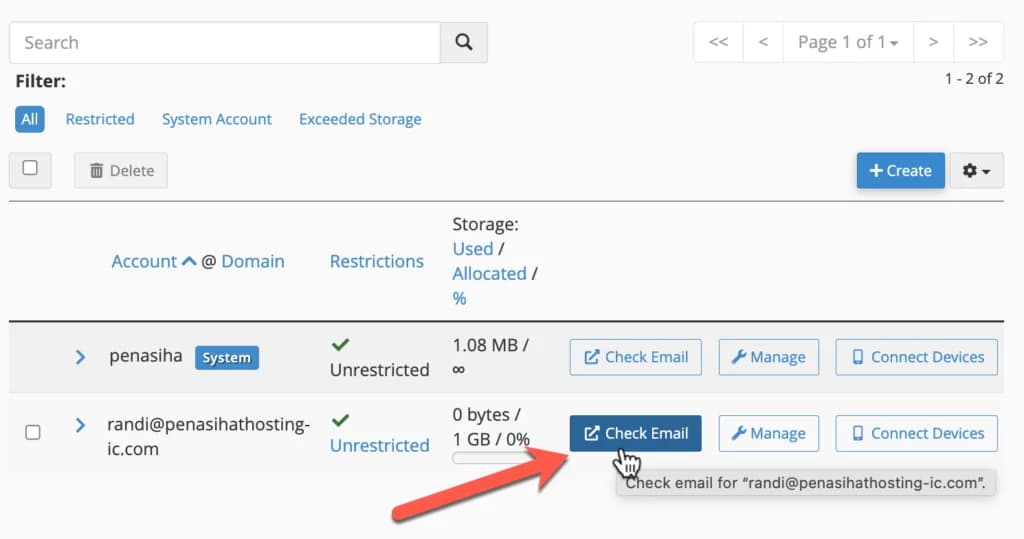
First, in the "Email Accounts" feature in cPanel, click the "Check Email" button
Second, type the url below in your browser:
http://domainanda.com/webmail(replace ‘yourdomain
’ with your domain name)
Then enter the email address and password that you created previously.
After you have successfully logged in, you will be directed to the webmail page with the new updated version of cPanel 108 as below:
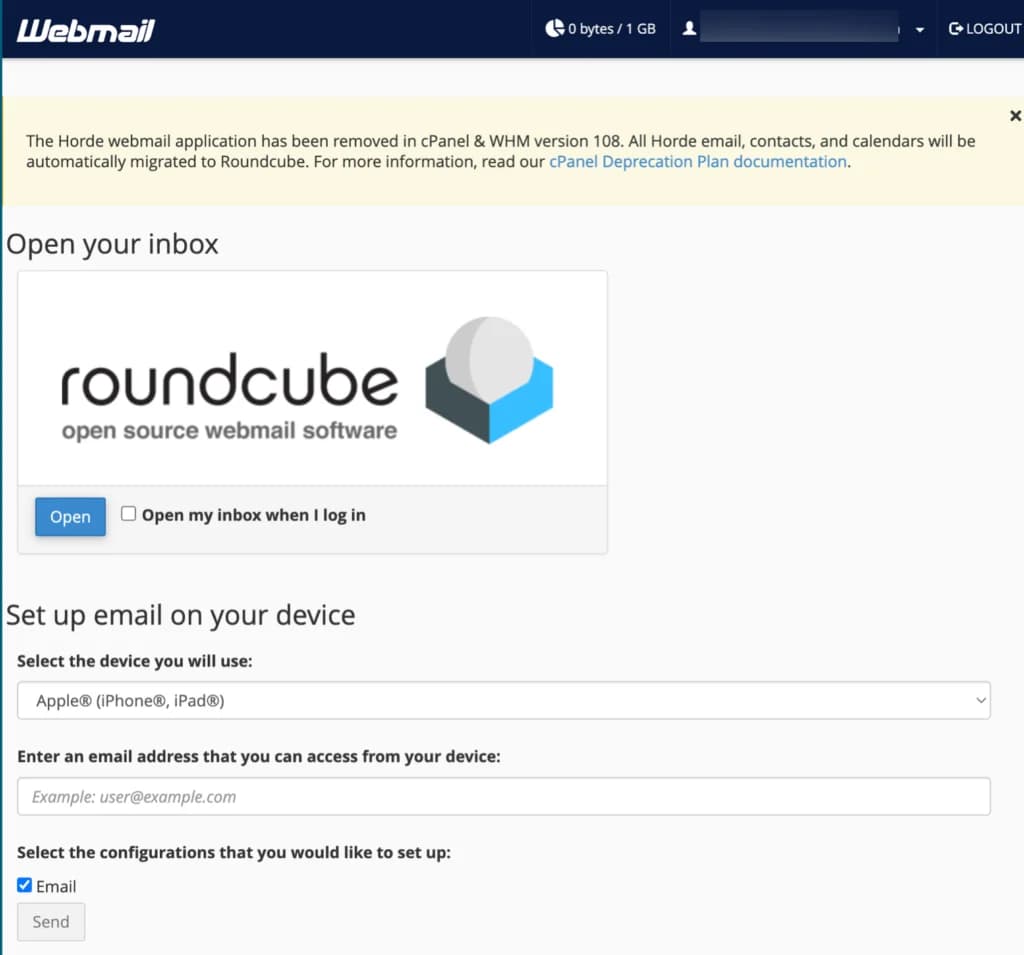
There is only one webmail client option in the cPanel 108 version, namely rouncube.
Oh, you can also access this webmail client via mobile. The settings vary depending on the device you use.
Using Desktop Email Client
Apart from using webmail, you can also configure desktop email clients such as:
- Microsoft Outlook
2. Mozilla Thunderbird 3. Apple Mail4. eM ClientTo configure your email client, you need the following information:
- Email address -
[email protected]) - Username -
[email protected](usually the same as email address) - Password - Your email password
- Incoming server (IMAP) - mail.yourdomain.com (Port: 993, SSL: Yes)
- Outgoing server (SMTP) - mail.yourdomain.com (Port: 465, SSL: Yes)
The exact server information can be found in the “Email Accounts” section of cPanel, click “Connect Devices” on the email account you want to configure.
Forwarding your email to another email address
Let's say you want emails received by [email protected] to be forwarded to another email address you own - such as [email protected].
First of all, click "Forwarders" in your cPanel, then click "Add Forwarders" to get to the page below:
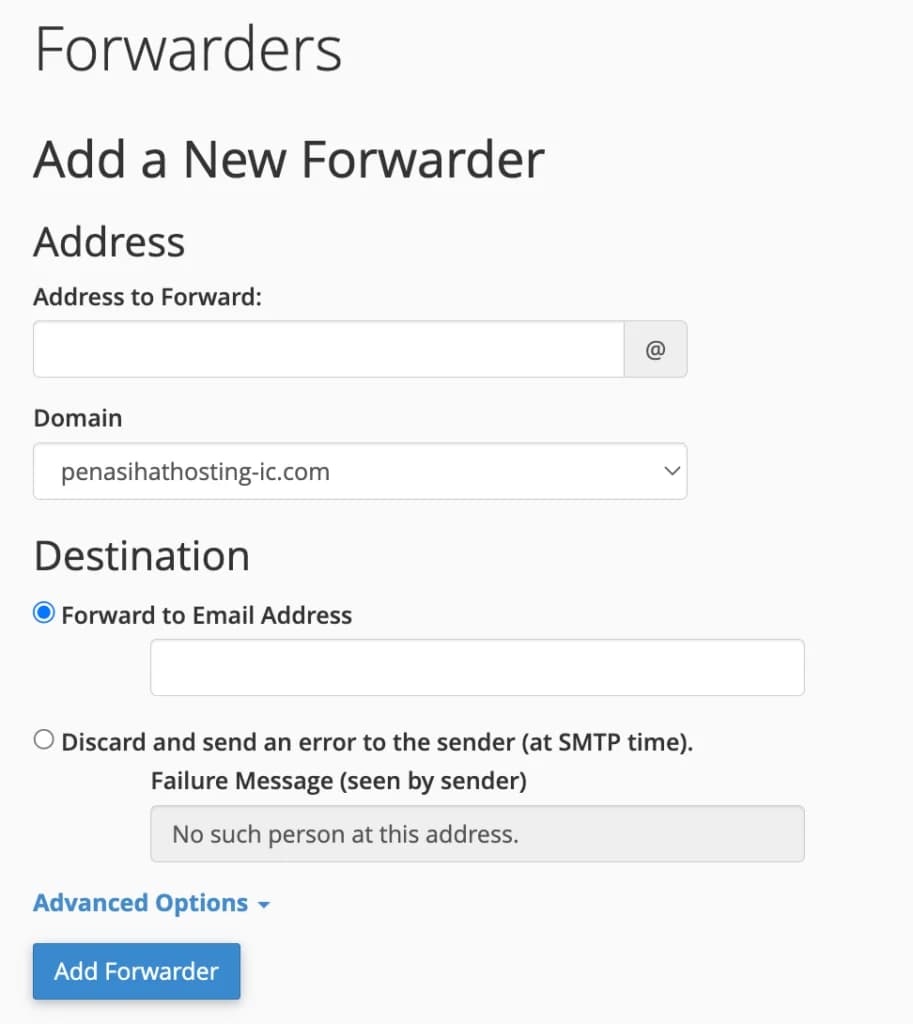
Here you need to enter the email address that you previously created [email protected] in the "Address to Forward" column and select the forward destination in the "Forward to Email Address" column.
You need to know that this email forwarding setting is only for forwarding, meaning that when you reply to a message from
[email protected], it means the message is replied to from that email, not from the email you created in the[email protected]cPanel.
Types of Forwarding
There are several types of forwarding you can configure:
-
Forward to Email Address - Forwards an email to another email address
-
Forward to System Account - Forwards email to the system account on the server
-
Discard with Message - Discards the email and sends the message to the sender
-
Pipe to a Program - Forwards email to a program or script
Set Spam Filters
In general, cPanel gives you a tool to filter spam emails, namely Apache SpamAssassin™, but you may find other tools such as SpamExperts Pro in your cPanel.
Basically, both tools have the same function, but usually "SpamExperts Pro" is only provided if you subscribe to a certain hosting package. Generally only available on business/enterprise hosting packages.
Because cPanel generally uses Apache SpamAssassin™, this time I will just explain the settings for that tool.
First, click Spam Filters in the “Email” section of your cPanel home screen.
Then you will be directed to the page below:
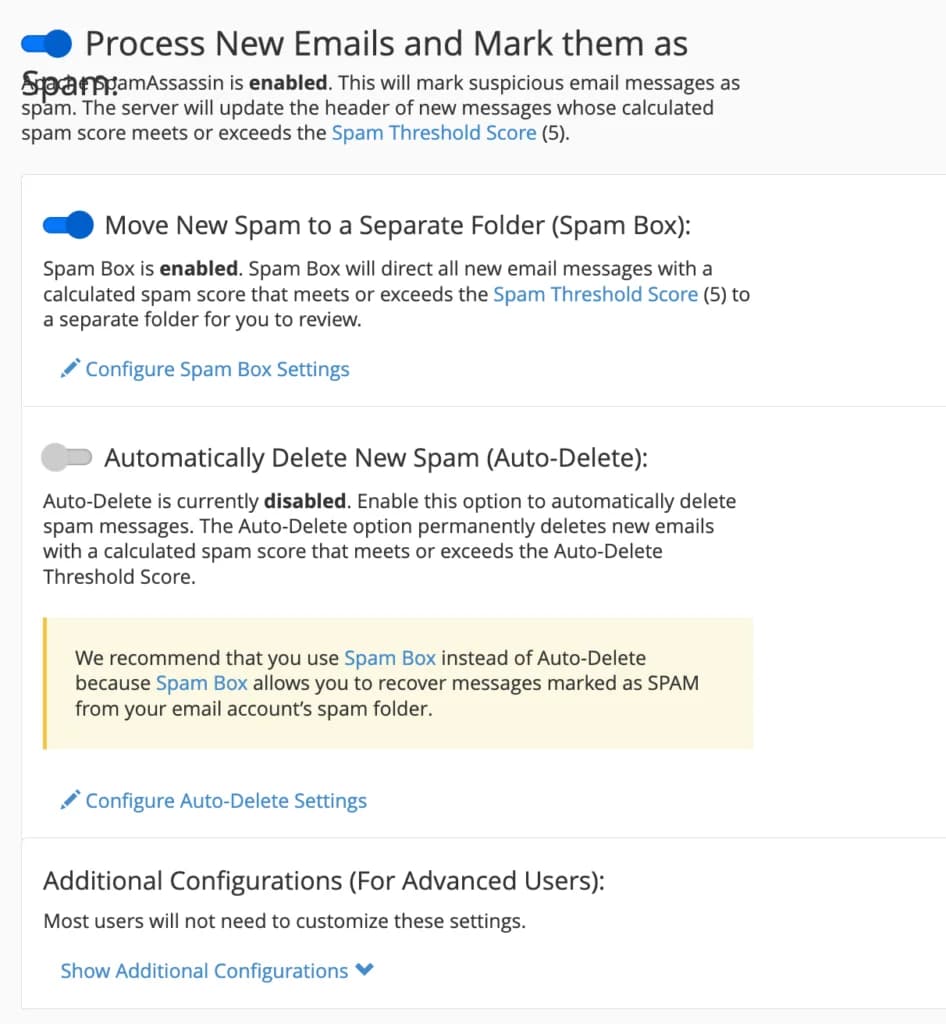
On this page, you will be faced with several options:
- In general, in the latest cPanel the "Apache SpamAssassin" setting is automatically activated, but if you see it has not been activated, a blue button will appear that says "Enable Apache SpamAssassin, where you have to click the button to activate spam filters.
- Automatically Delete New Spam (Auto
- Delete) if you want to not only mark spam emails, but also automatically delete spam emails.
- You can also set how sensitive the spam filter is on a scale of 1-10, where 1 is the most liberal and 10 is the most conservative.
Finally, you can also blacklist or protect certain emails by whitelisting the "Configure Apache SpamAssassin™" settings.
But for now (the first time) just leave those settings, because you don't need them yet.
Best Practices for Spam Filtering
Here are some best practices for configuring spam filtering:
- Start with default settings - Do not change sensitivity settings immediately
- Check your spam folder regularly - Make sure important emails don't end up in your spam folder
- Whitelist important senders - Add important email addresses to the whitelist
- Adjust the sensitivity gradually - Change it little by little and monitor the results
- Use a combination of filters - Leverage SpamAssassin and other email filters
Other Email Features in cPanel
Apart from the features discussed above, cPanel also provides several other email features:
Autoresponders
Autoresponders allow you to send automatic replies to incoming emails. This is useful for:
- Leave or holiday notifications
- Confirm receipt of email
- Alternative contact information
- Answers to frequently asked questions
To set up an autoresponder:
- Click “Autoresponders” in the Email section
- Click "Add Autoresponder"
- Select an email account, specify an interval, and compose a message
- Click "Create/Modify"
Email Filters
Email Filters allows you to set email filtering rules based on specific criteria. You can:
- Move emails to specific folders
- Mark emails as read
- Deleting emails
- Forwarding emails
To set email filters:
- Click “Email Filters” in the Email section
- Click “Create a New Filter”
- Define rules and actions
- Click "Create"
Mailing Lists
Mailing Lists allows you to create and manage email lists for mass communication. This is useful for:
- Newsletters
- Announcement
- Group discussions
- Email marketing
To create a mailing list:
- Click “Mailing Lists” in the Email section
- Click “Create a Mailing List”
- Fill in the required information
- Click "Add"
Conclusion
Setting up an email account in cPanel is an important step to building a professional online identity. By having an email address with your own domain, you can increase the credibility and branding of your business or website.
In next chapter, we will learn how to manage website files in cPanel, including how to use File Manager and FTP.
Professional Email Tips
Create multiple functional email addresses such as [email protected], [email protected], and [email protected] to separate communications based on their purpose. This makes email management more organized and gives a professional impression to recipients.